A document is a single, real-world instance of a template — a specific Declaration of Performance for a specific product, a specific Instruction Manual for a specific batch. Documents are where the abstract layout of a template meets the concrete data that describes your product.
Every document is built from one template (chosen at creation), has a master language and a set of dynamic field values, moves through a lifecycle (Draft → Published → Superseded or Withdrawn), and produces a multilingual PDF as its output.
Documents Overview Page
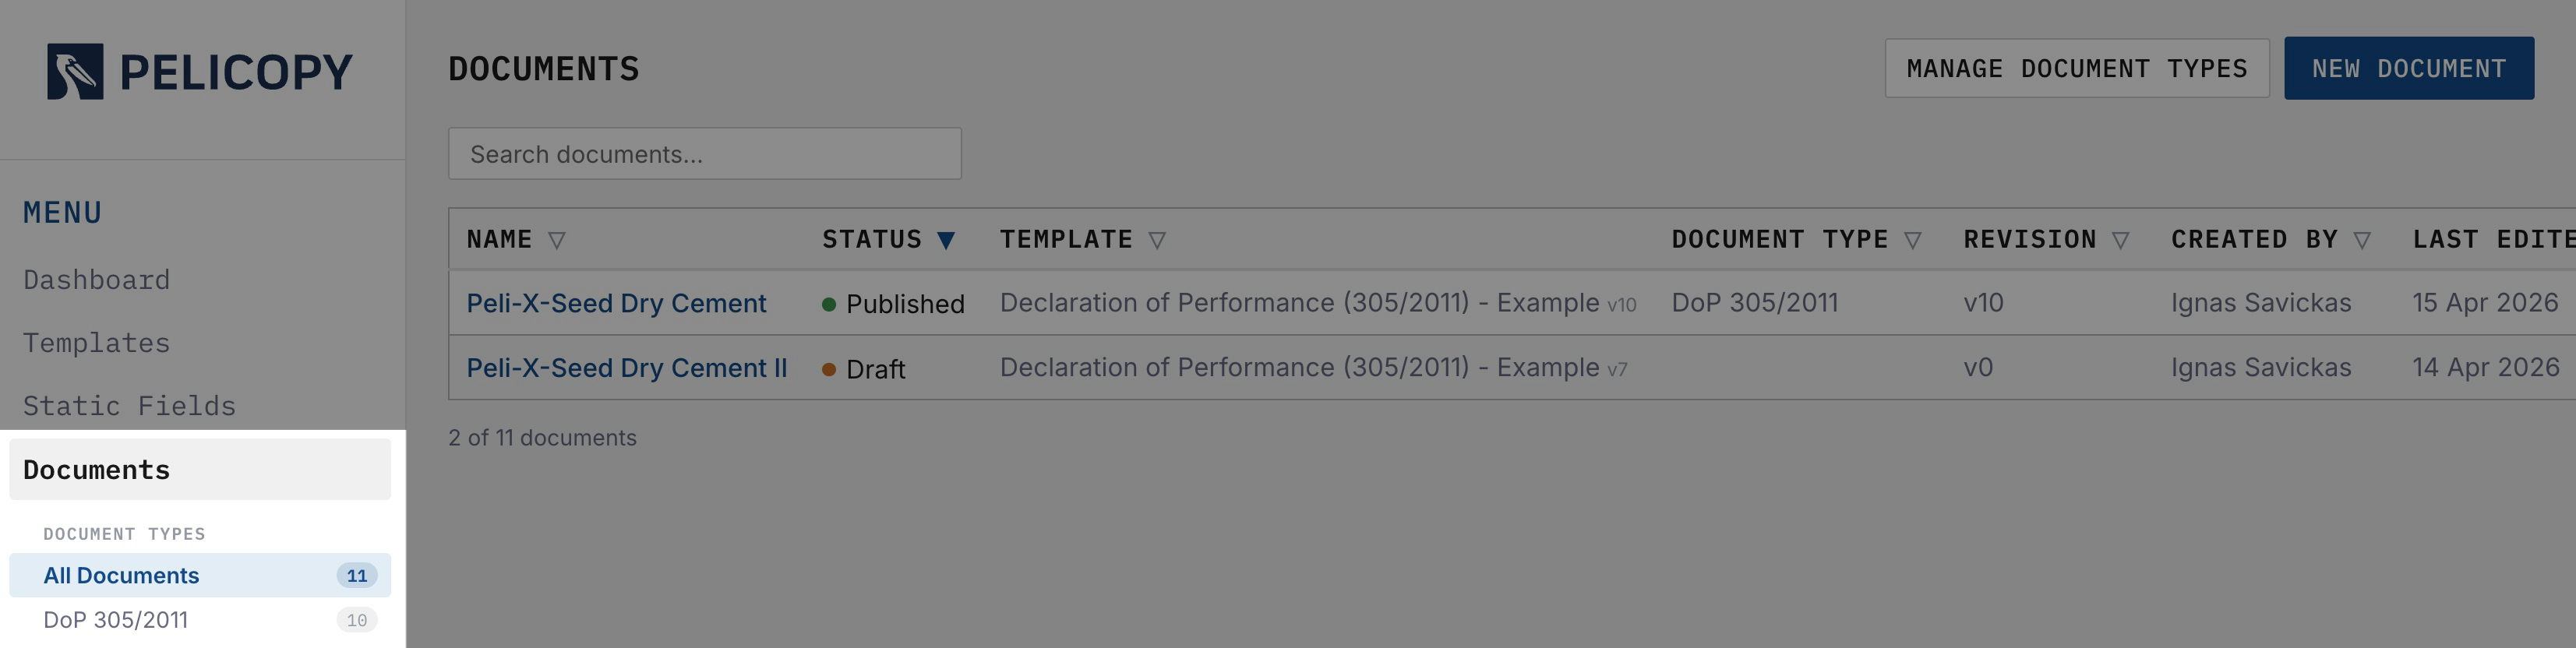
The Documents page lists every document in your organization.

Each row shows the following columns:
- Name — the human-readable name of the document.
- Status — Draft, In Review, Published, Superseded, or Withdrawn (see Status Lifecycle).
- Template — the template this document is built from.
- Document Type — the type category (e.g. Declaration of Performance, Instruction Manual). Helps sort and filter a large document library. Optional.
- Revision — the current revision number.
- Created By — the user who originally created the document.
- Last Edited — when the document was last modified.
- Actions — edit, generate PDF, duplicate, or delete.
Above the list you’ll find:
- A search box for filtering documents by name.
- Filter controls for narrowing the list by status, template, document type, and other attributes.
- A Manage Document Types button.
- A New Document button.
Clicking any document row opens the document editor.
Documents Lifecycle Status
Every document moves through a defined lifecycle:
- Draft — the document is being worked on. All fields are editable.
- In Review — the draft has been submitted to another user for approval. The document is locked for edits until the reviewer approves or rejects.
- Published — the document is finalized and locked. You can generate PDFs, create a new revision, or withdraw it.
- Superseded — this revision has been replaced by a newer revision. It can still be printed, but only in the master language.
- Withdrawn — the document has been permanently retired. It can still be printed, but only in the master language.
Managing Document Types
Document Types are optional categories for organizing your documents (e.g. Declaration of Performance, Declaration of Conformity, Instruction Manual, User Guide).
The Manage Document Types button opens a dialog where you can:
- Rename existing types.
- Delete types you no longer need. Documents that used a deleted type simply become uncategorized.
- Create new types.
Types are also used in the sidebar to group documents by category, so a well-curated list of types makes it easier to navigate a large document inventory.
Creating a New Document
Clicking New Document opens a modal with four fields:
- Name — the document’s name (usually includes the product reference).
- Template — the template this document will be built from. Choose carefully: a document can only be re-templated by being recreated.
- Document Type — optional; a category for organizing the document.
- Master Language — the source language for the document’s data.
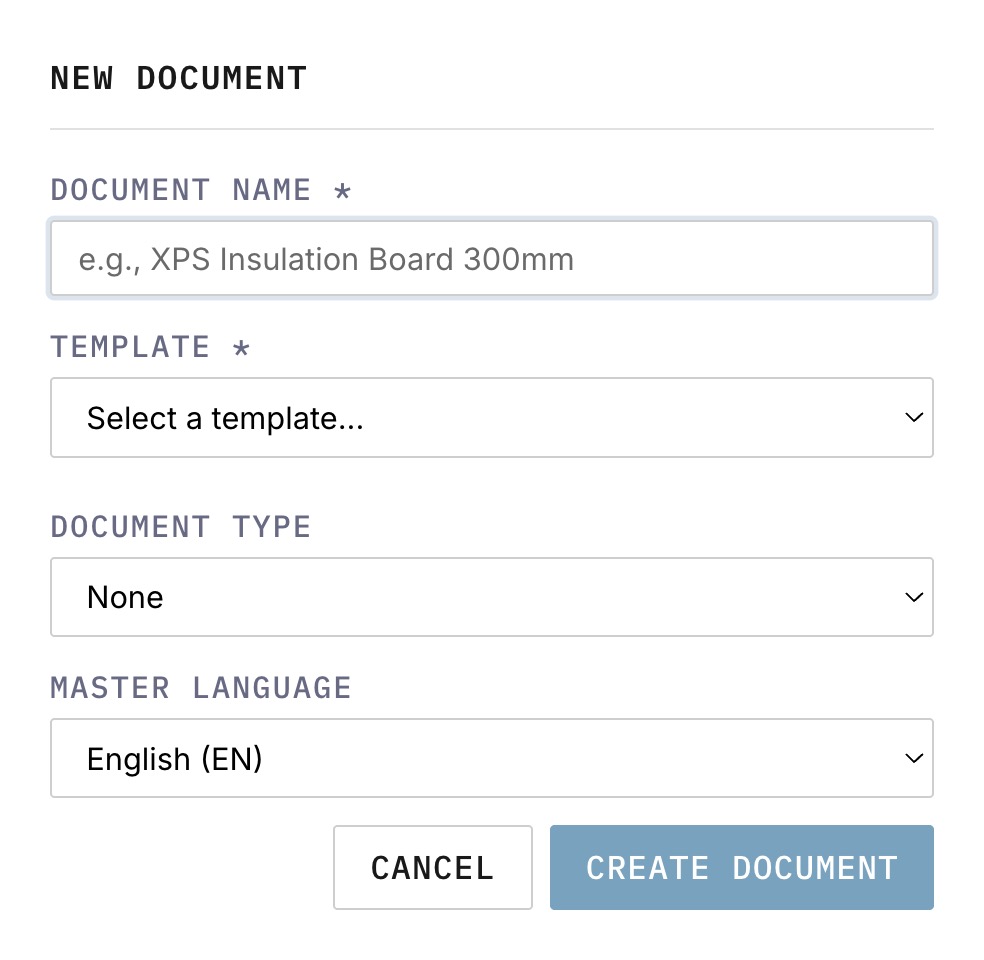
Clicking Create Document creates the document record and opens it directly in the document editor.
Documents Sidebar
A sidebar on the left groups documents visually. When Document Types are configured, the sidebar shows each type with a live count, so clicking a type filters the main list down to just those documents. It’s the fastest way to focus on a single family of documents when your inventory grows large.
Document Editor Overview
The document editor has two sides.
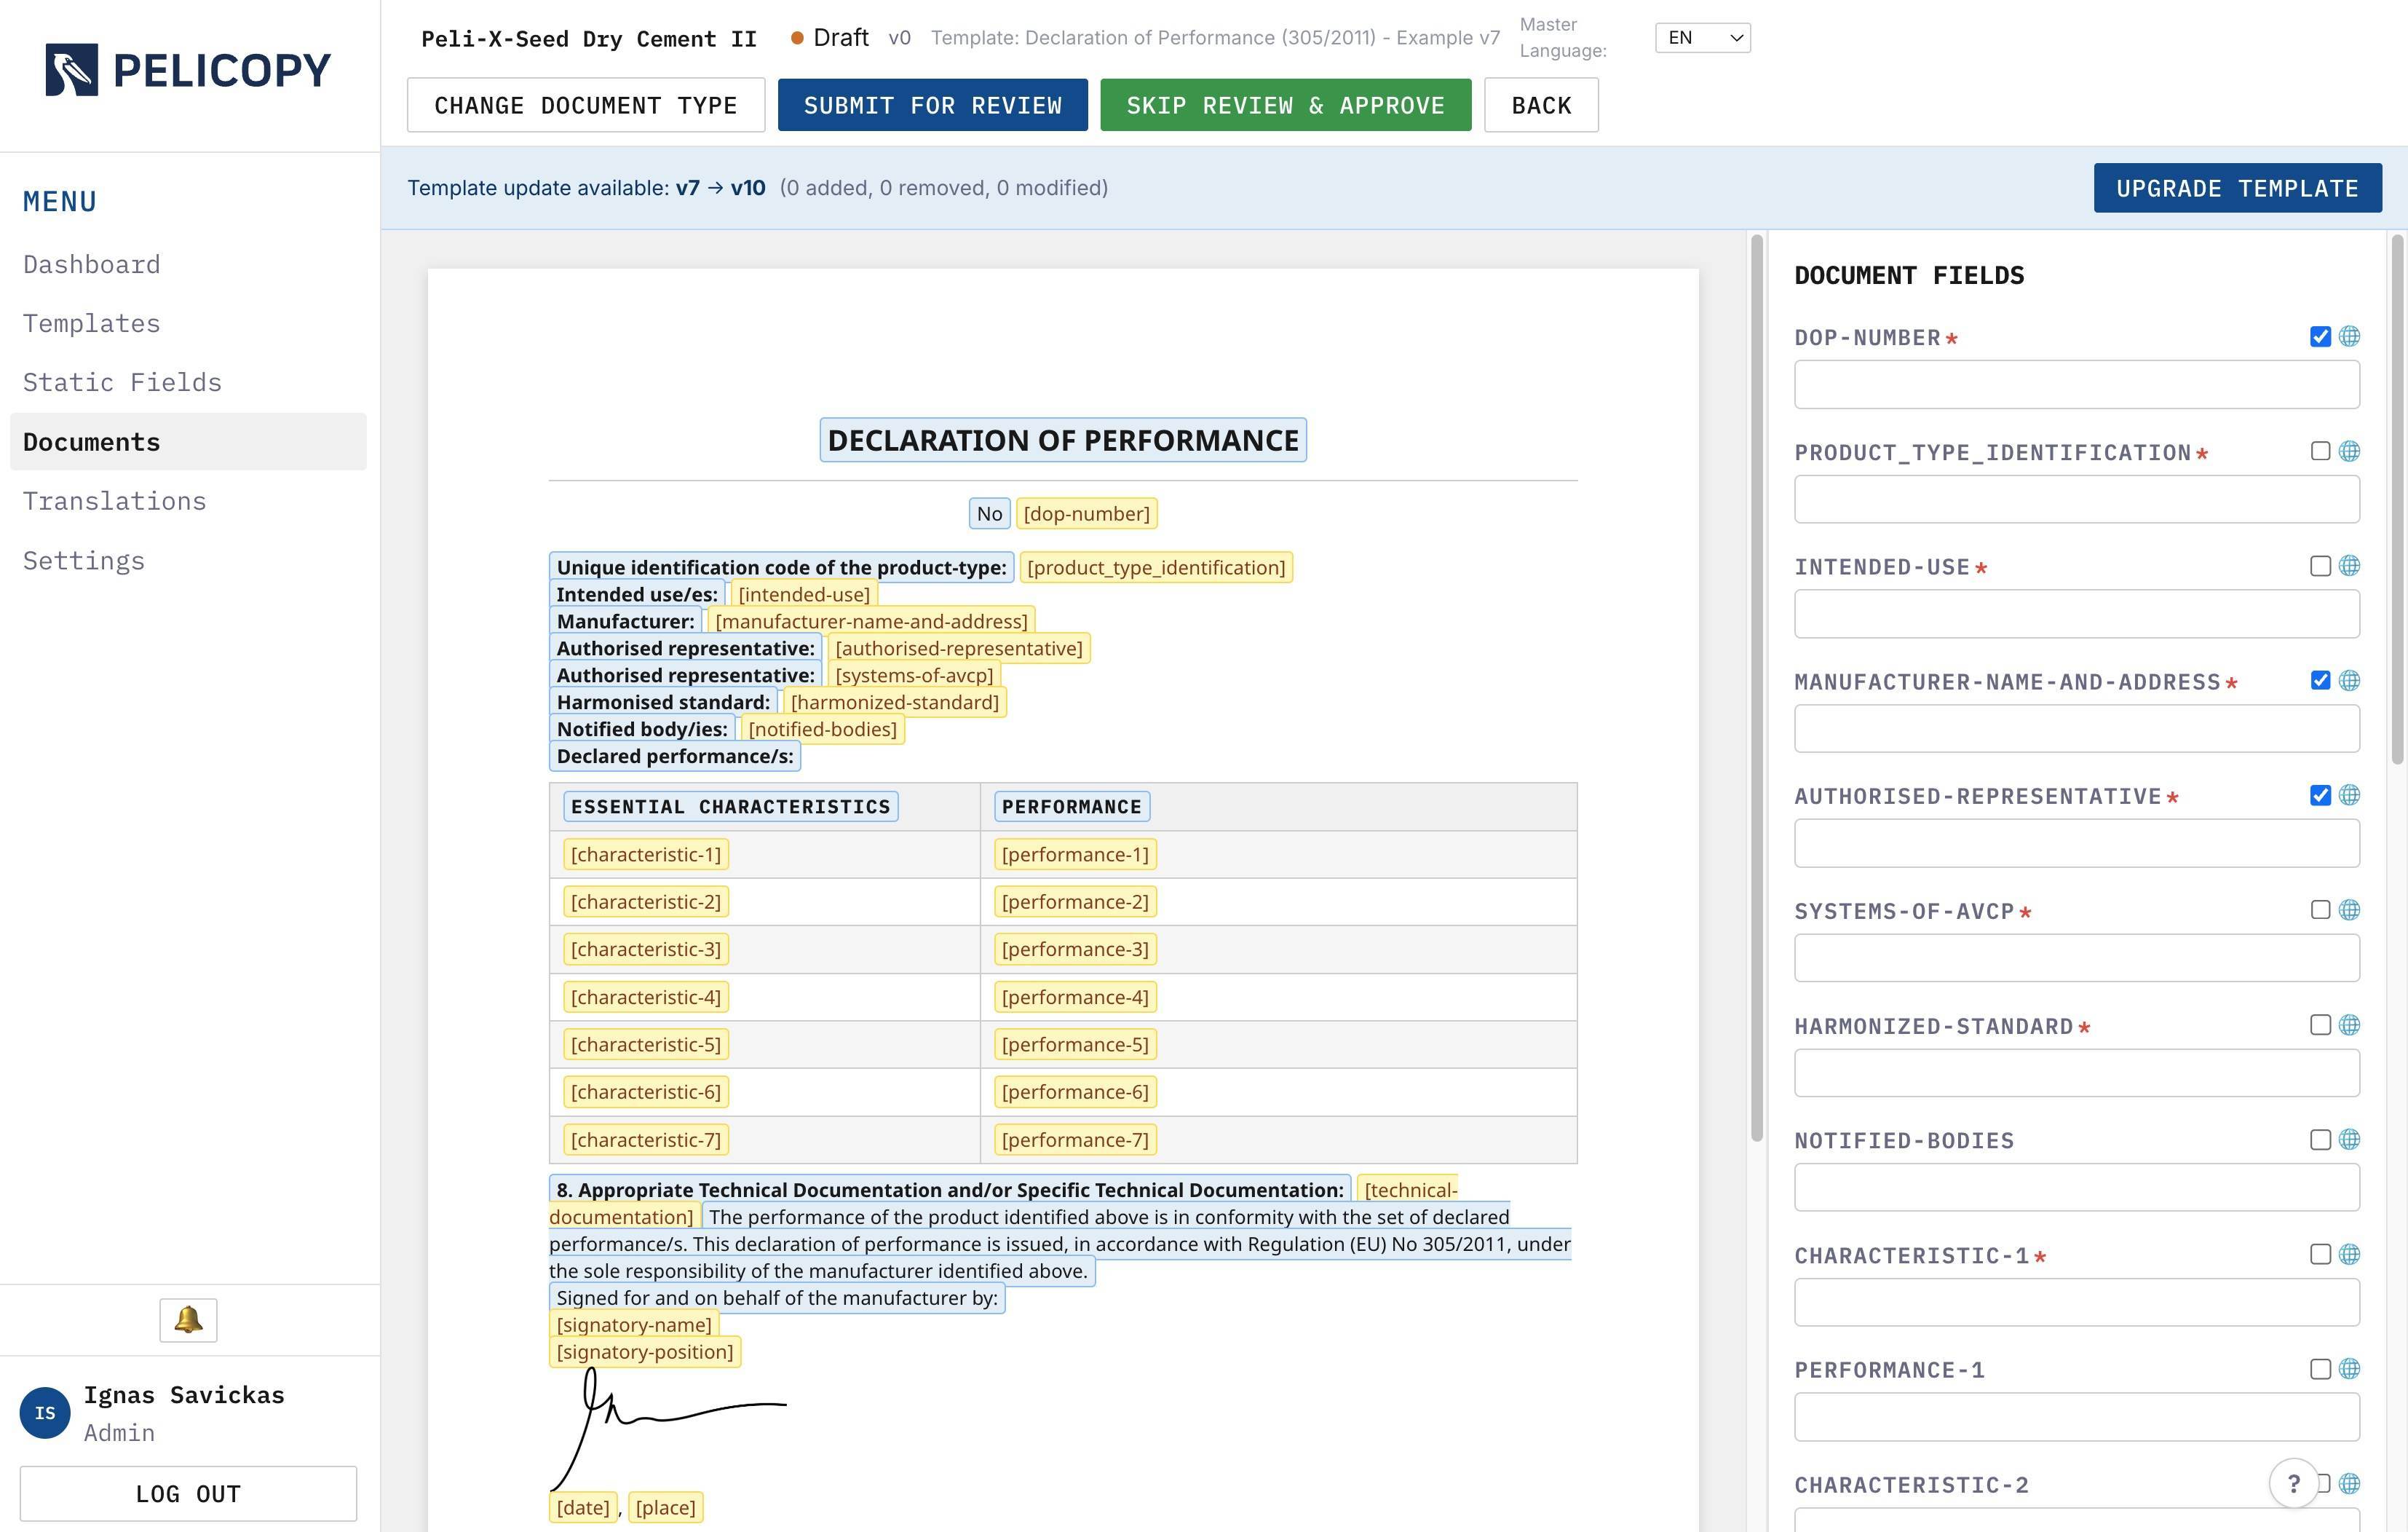
- Centre — a live preview of the document itself, rendered with the template layout. Static fields are highlighted in blue. Dynamic fields that haven’t been filled in yet show in yellow, and dynamic fields that have been filled turn green. This lets you see at a glance which fields still need data.
- Right side — the input form. Every dynamic field defined by the template appears here as an input, ready to receive the value specific to this document.
Each dynamic field in the form has a small “doesn’t need translation” checkbox next to it. Tick it when the field’s value is pure data — a performance value, a document number, a reference code — that shouldn’t be translated into other languages. Non-translatable fields carry their master-language value through to every language PDF unchanged, and they’re skipped by the translation queue.
Edits to the document auto-save as you type, so there is no “save” button to worry about.
Click the document’s name at the top of the editor to rename it.
Document Editor Action Bar
The action bar at the top of the document editor adapts to the document’s current status.
While in Draft:
- Submit for Review — send the document to another user for approval. The document enters In Review status and is locked until the reviewer acts.
- Skip Review & Approve — publish the document immediately without a review step. Useful for small organizations or documents that don’t require a separate sign-off.
While In Review (visible only to the reviewer):
- Approve — approve the document and publish it.
- Reject — send it back to draft status with a reason. The author can then address the feedback and re-submit.
Once Published:
- Create New Revision — spin up a new draft revision based on the current one.
- Withdraw — retire the document.
- Generate PDF — produce the final multilingual PDF.
A Back button is always available to return to the Documents overview.
Translating Documents Into Other Languages
The document editor is where you enter the master-language data for a document. Translation of that data into your other languages is handled separately, in the Translations module, where each language has its own queue and workflow.
Static fields used by the document are translated centrally in the Static Field Library, not per document.
Creating New Document Revision
The Create New Revision button is available on published documents. Clicking it:
- Takes a snapshot of the current revision and marks it as Superseded.
- Creates a new draft revision, pre-filled with the existing data, for you to modify.
- Assigns the next revision number.
You can then edit the new revision as you would any other draft and publish it when ready. The superseded revision remains in the system and can still be printed in its master language, but not in other languages.
Withdrawing documents
The Withdraw button permanently retires a published document. Because withdrawing is significant, the action is gated behind a confirmation dialog that requires:
- Typing the document name to confirm.
- Optionally entering a reason for the withdrawal (recorded in the audit log).
Withdrawn documents are not deleted. They remain in the system for archival purposes and can still be printed in the master language, but they no longer appear in active lists by default and cannot be printed in any other language.
Generate PDF Output
The Generate PDF button opens the PDF generation screen.
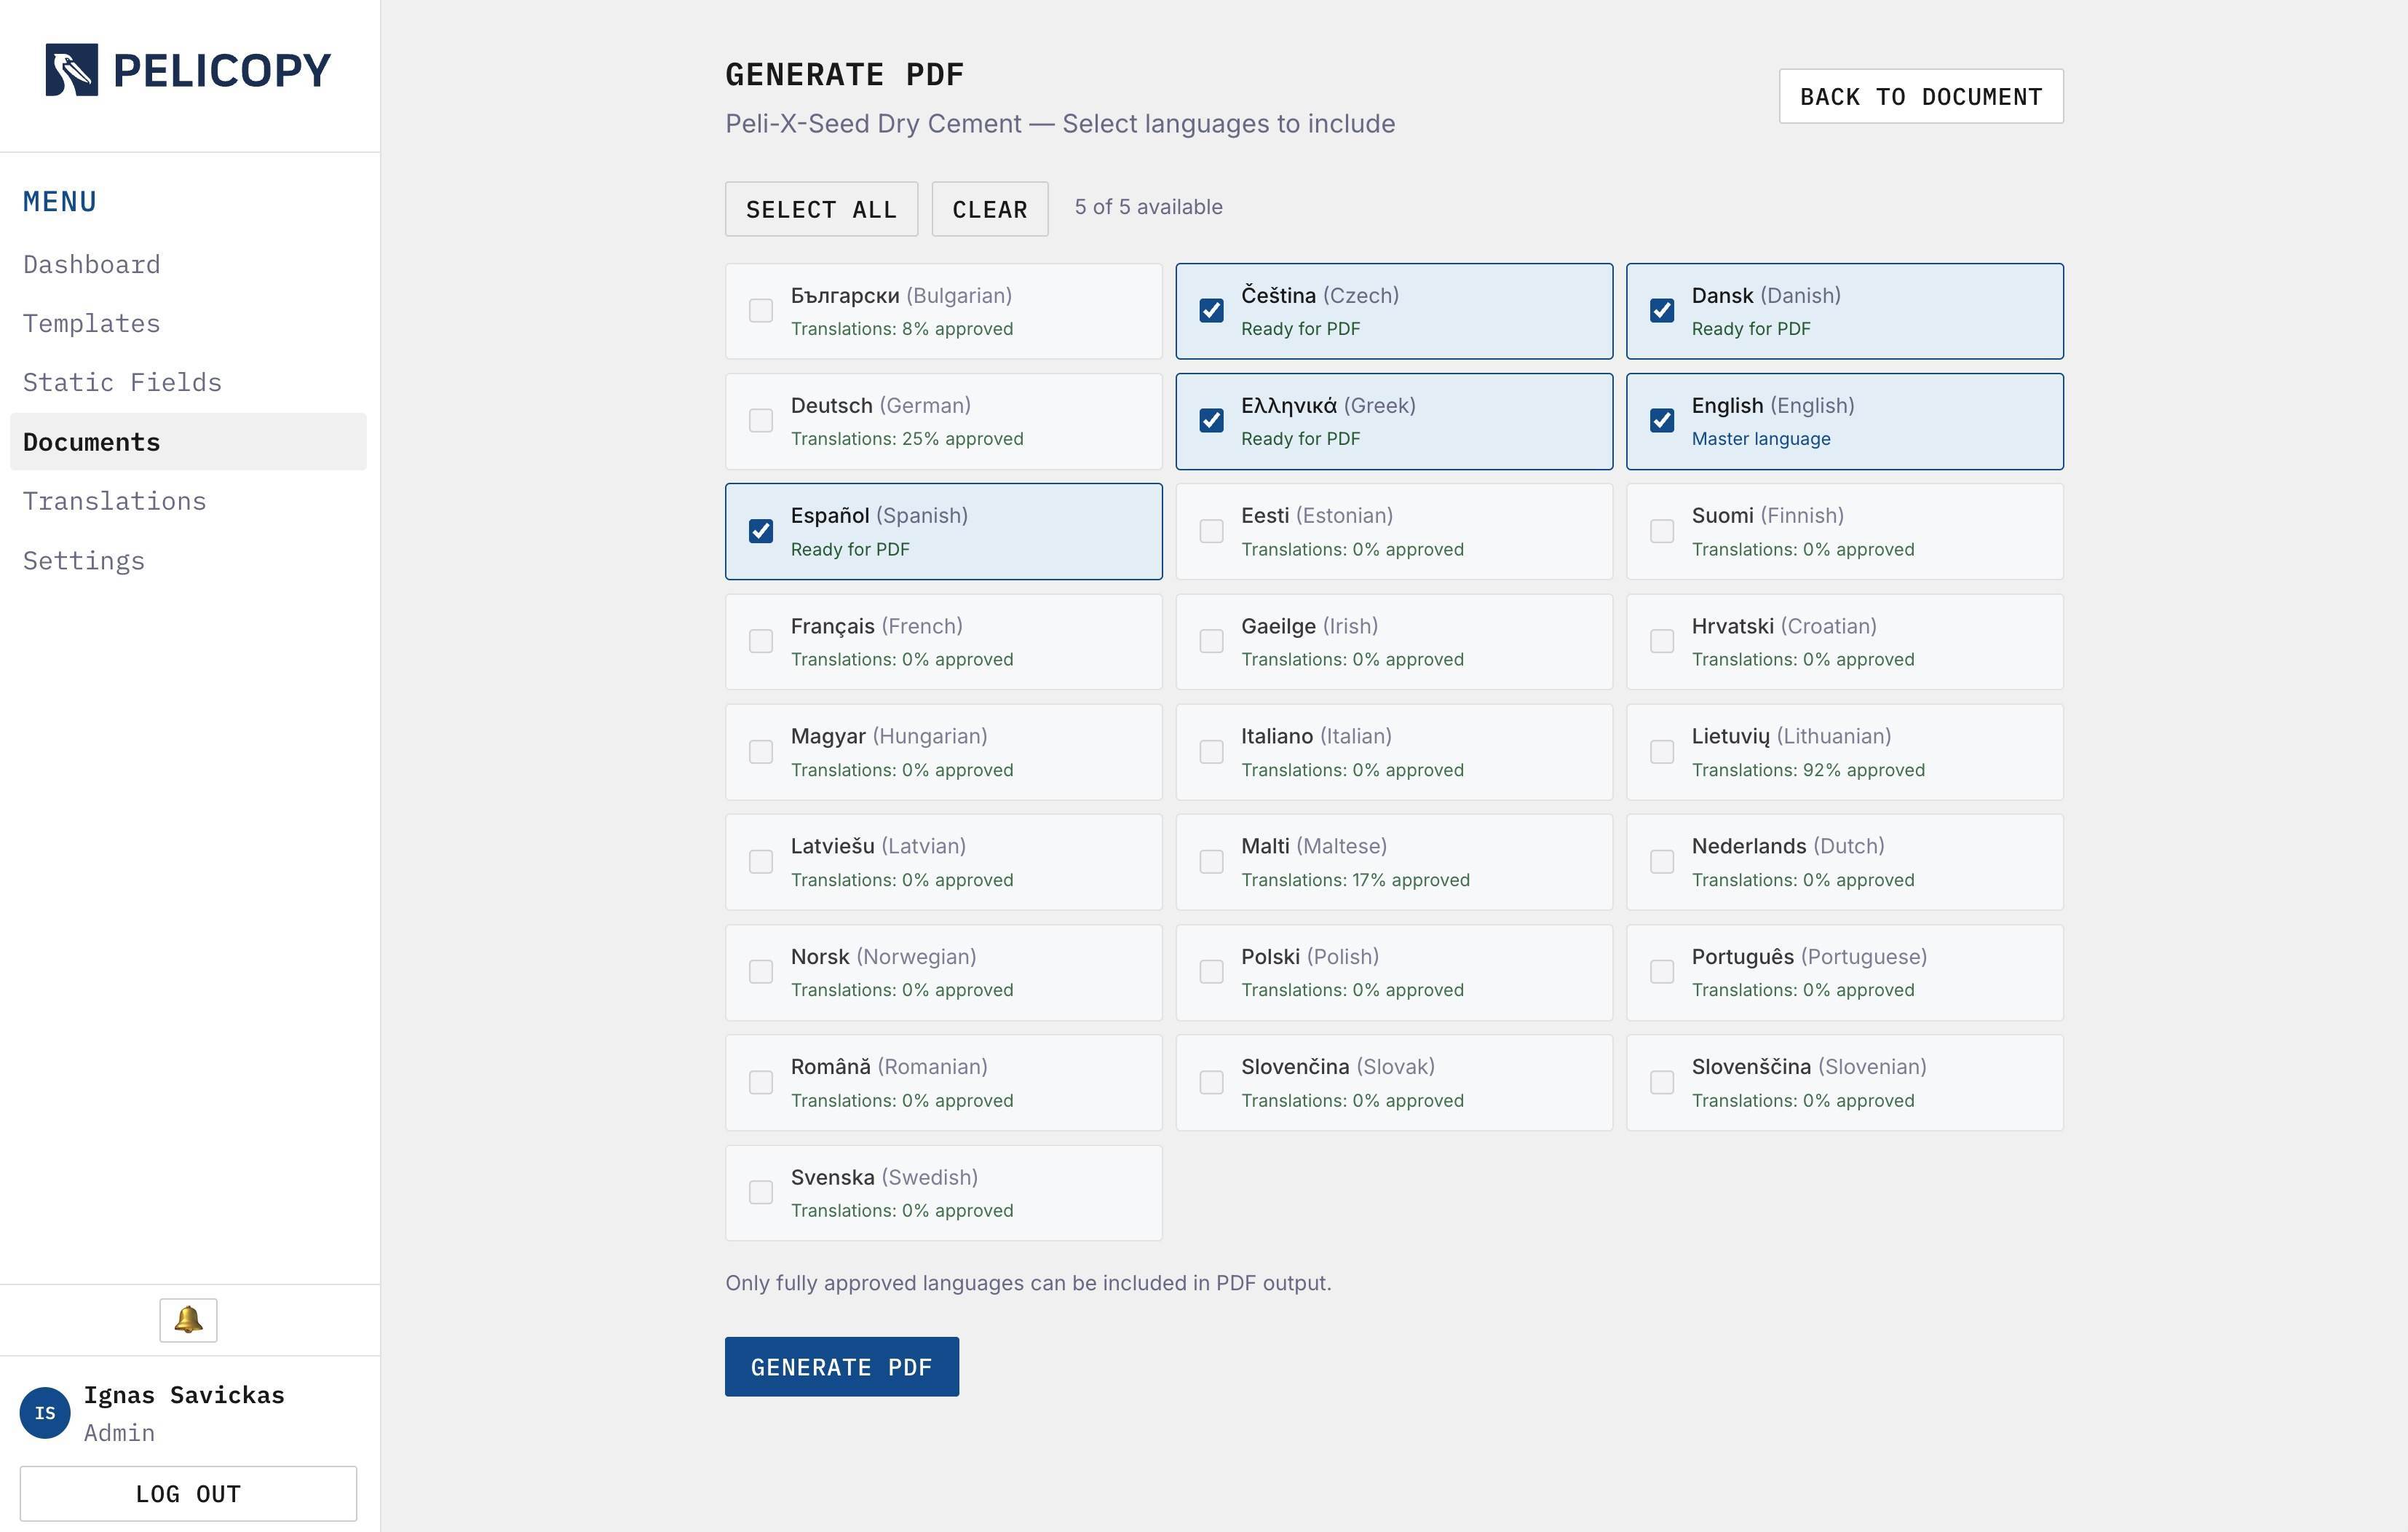
Here you’ll see every language your organization has enabled. Only languages whose dynamic fields and static fields are all fully translated and approved (and not stale) are eligible for selection. Incomplete languages are shown but disabled, with an indicator of what’s still missing.
You can:
- Tick individual language checkboxes.
- Click Select All to include every eligible language.
- Click Clear to deselect everything.
Clicking Generate PDF assembles the final multilingual PDF. The languages are printed in sequence, in the order they appear in the list, with the optional cover page rendered once at the start of the document.
Once generation finishes, two buttons appear below:
- Preview — opens the PDF in a new tab for visual inspection.
- Download — downloads the PDF file.
For superseded or withdrawn documents, only the master language is available.